Inside your Windows VM, open an elevated command prompt (right-click Command Prompt from the Start menu, and Run as Administrator), then issue the following command:
bcdedit /set useplatformclock true
Now, you need to restart the guest—this change is persistent, but it doesn’t actually take effect until the guest reboots! After the reboot, the guest’s clock will stop drifting.
You buy a nice new firewall appliance. You install OpnSense on it, set all the WAN and LAN stuff up to match your existing firewall, and you drop it into place. WTF, no internet…?
First of all, if you’re using a cable ISP, remember that most cable modems are MAC address locked, and will refuse to talk to a new MAC address if they’ve already seen a different one connected. So, remember to FULLY power-cycle your cable modem. Buttons won’t cut it, in many cases—you gotta unplug the power cable out of that sucker, give it a count of five to think about its sins, then plug it back in and let it re-sync.
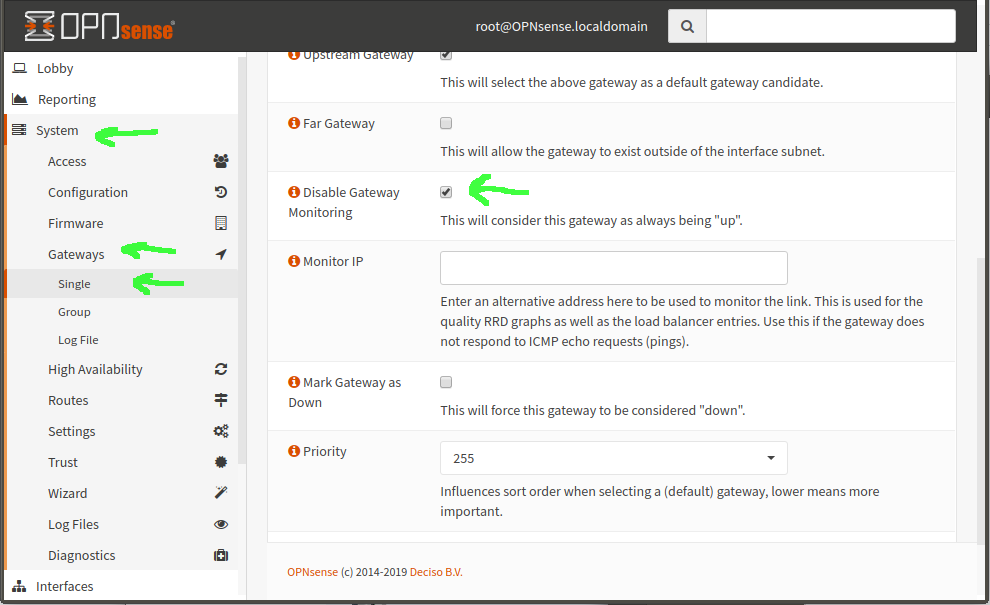
If you still don’t have any internets after power-cycling and your modem showing everything sync’ed and online, you may be falling afoul of a weirdness in OpnSense’s default gateway configs. By default, it will mark a gateway as “down” if it doesn’t return pings… but many ISP gateway addresses (not the WAN address your router gets, the one just upstream of it) don’t return pings. So, OpnSense reports it as down and refuses to even try slinging packets through it.
To fix this, go to System–>Gateways–>Single and select your WANGW gateway for editing. Now scroll down, find “Disable Gateway monitoring” and give that sucker a checkmark. Once you click “Save”, you should now see your gateway green and online, and packets should start flowing.
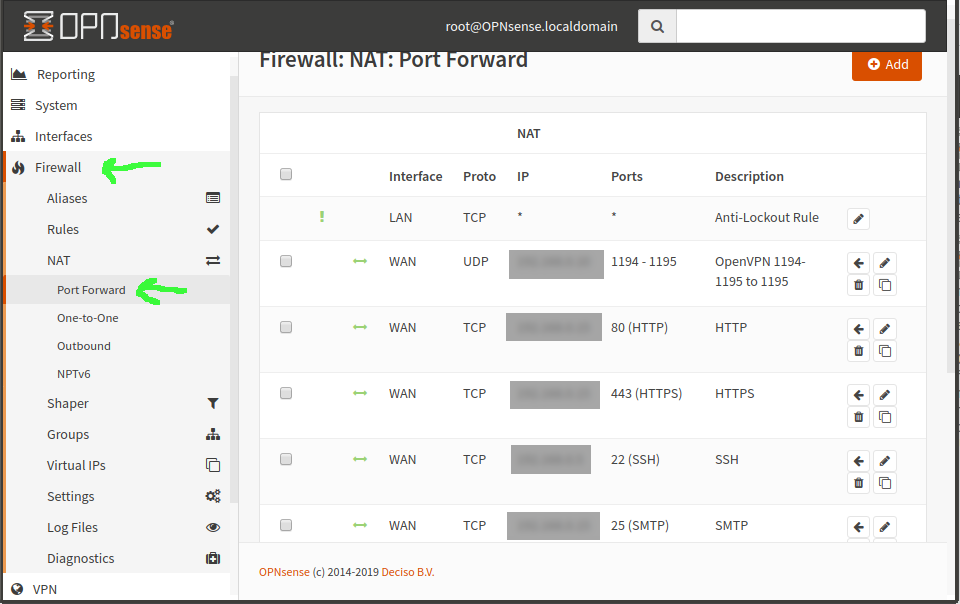
You’ve got a server on the LAN running OpenVPN, WireGuard, or some other VPN service. You port forwarded the VPN service port to that box, which was easy enough, under Firewall–>NAT–>Port Forward.
But now you need to set a static route through that LAN-located gateway machine, so that all the machines on the LAN can find it to respond to requests from the tunnel—eg, 10.8.0.0/24.
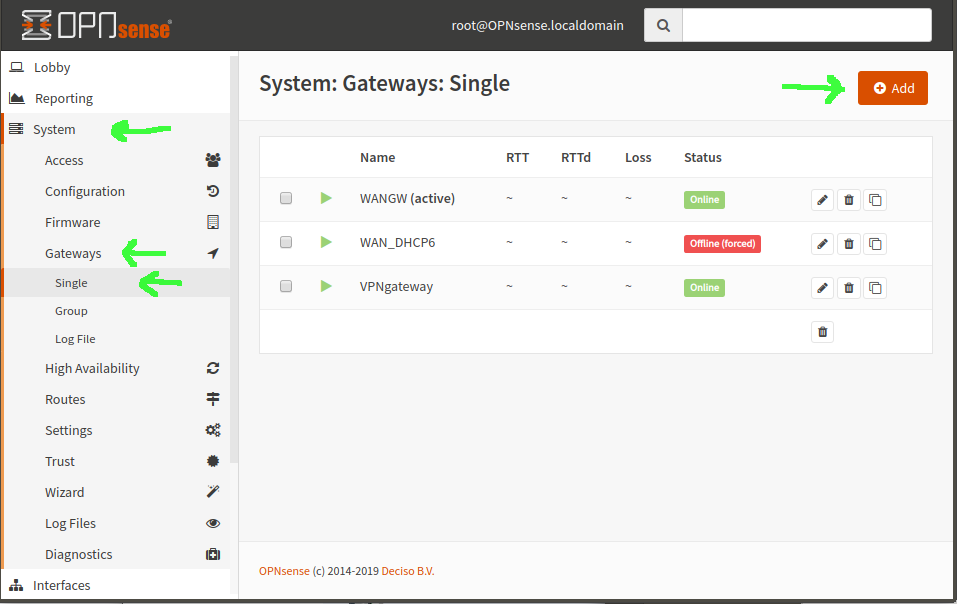
First step, in either OpnSense or pfSense, is to set up an additional gateway. In OpnSense, that’s System–>Gateways–>Single. Add a gateway with your VPN server’s LAN IP address, name it, done.
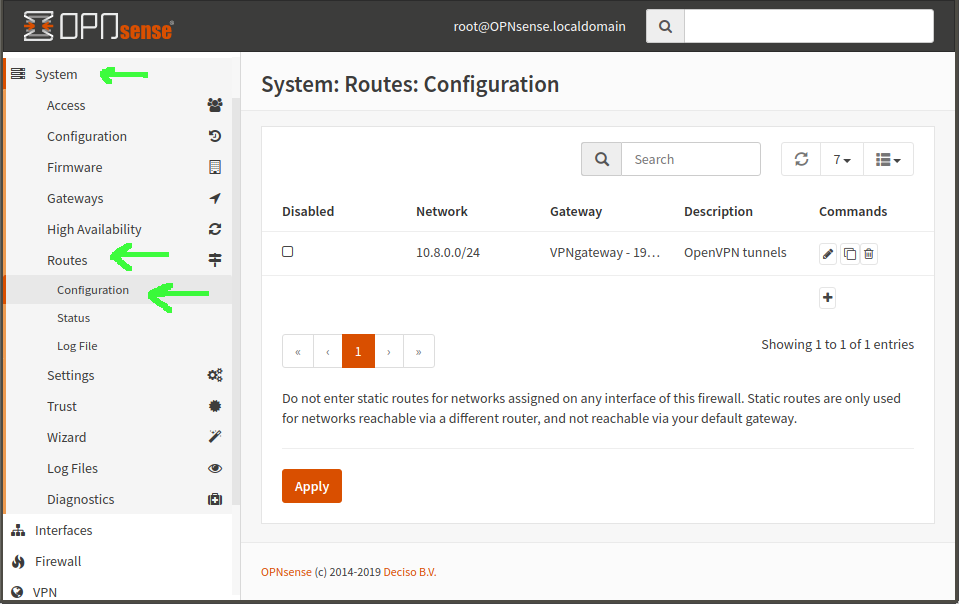
Now you create a static route, in System–>Routes–>Configuration. Network Address is the subnet of your tunnels—in our example, 10.8.0.0/24. Gateway is the new gateway you just created. Natch.
At this point, if you connect into the network over your VPN, your remote client will be able to successfully ping machines on the LAN… but not access any services. If you try nmap from the remote client, it shows all ports filtered. WTF?
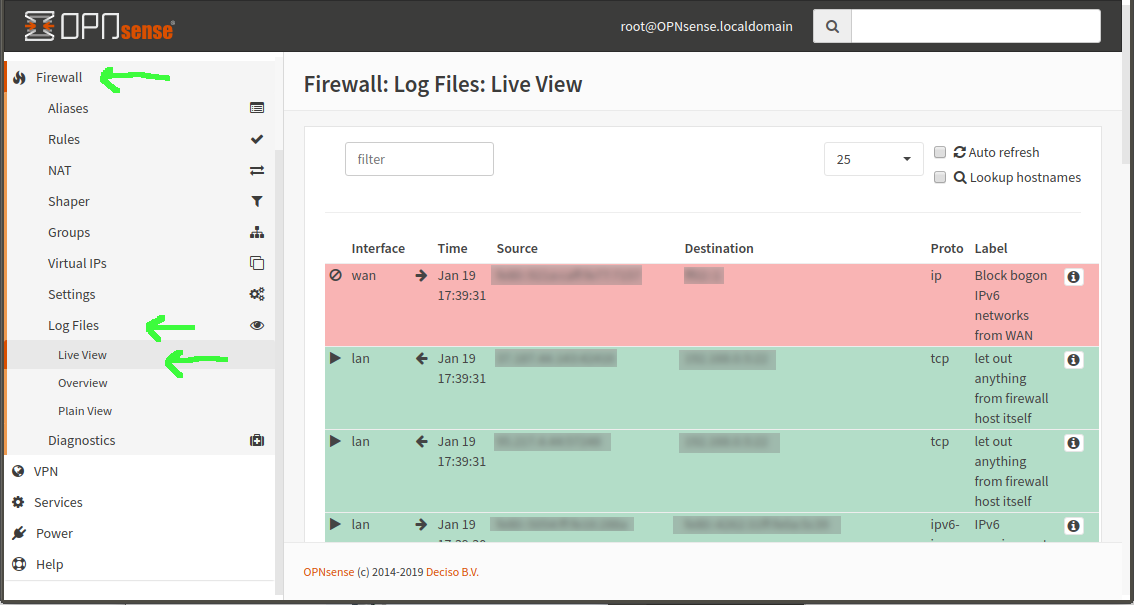
Diagnostically, you can go in the OpnSense GUI to Firewall–>Log Files–>Live View. If you try something nice and obnoxious like nmap that will constantly try to open connections, you’ll see tons of red as the connections from your remote machine are blocked, using Default Deny. But then you look at your LAN rules—and they’re default allow! WTF?
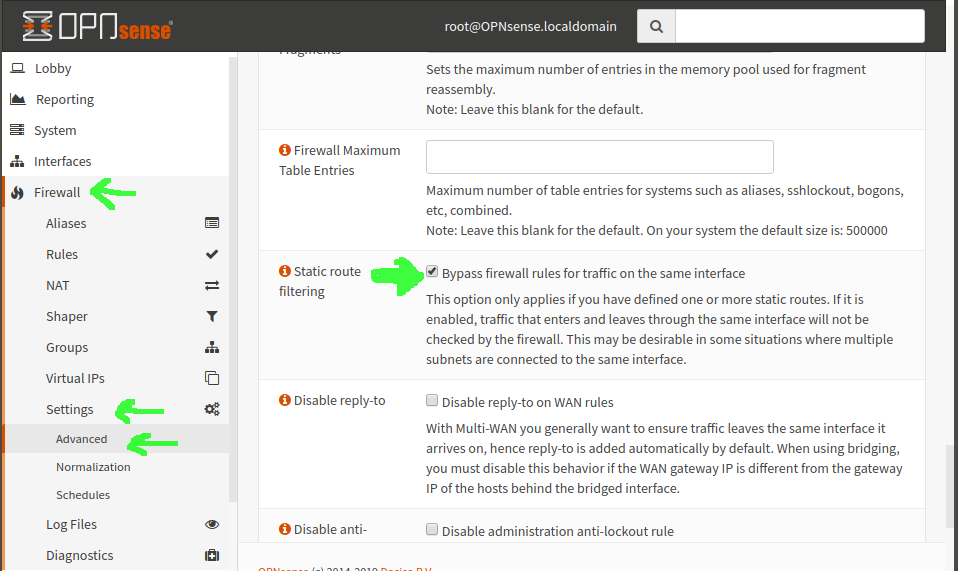
I can’t really answer W the F actually is, but I can, after much cursing, tell you how to fix it. Go in OpnSense to Firewall–>Settings–>Advanced and scroll most of the way down the page. Look for “Static route filtering” and check the box for “Bypass firewall rules for traffic on the same interface”—now click the Save button and, presto, when you go back to your live firewall view, you see tons of green on that nmap instead of tons of red—and, more importantly, your actual services can now connect from remote clients connected to the VPN.
This is the dastardly little bugger of a setting you’ve been struggling to find.