TPM errors in Windows 11

The last several machines I’ve built–and several long-running machines with nothing wrong with them–have suddenly started displaying strange errors regarding Microsoft 365. The affected machines can neither register Office365 apps to the entire machine successfully, nor will they accept user logins to the Outlook desktop app.

Although you don’t get any obvious errors when Outlook refuses to accept a valid password–confirmed by entering the same password successfully to log into Outlook on the Web in the same machine’s browser–scouring Event Viewer carefully enough will lead you to notice TPM related warnings and errors in the System log, occurring each time you attempt to log into desktop Outlook or attempt to register Office365 apps globally.

The extremely poorly documented actual fix requires at least one and sometimes up to three steps, followed by a reboot. If you want to perform all three steps pre-emptively then reboot, fine–but if you find you need to perform more steps, please realize you will need to reboot again following those additional steps!

Step one: regedit

First, you need to update two registry keys (you may save this text as a .reg file and add it to your Registry directly; the key names have been the same on the ten or so machines I’ve fixed in the last several weeks, despite looking like there might be GUIDs there):

Windows Registry Editor Version 5.00

[HKEY_CURRENT_USER\Software\Microsoft\Office\16.0\Common\Identity\Identities]
"EnableADAL"=dword:00000001

[HKEY_LOCAL_MACHINE\SOFTWARE\Microsoft\Cryptography\Protect\Providers\df9d8cd0-1501-11d1-8c7a-00c04fc297eb]
"ProtectionPolicy"=dword:00000001

Step two: (DANGER!) clear TPM (DANGER!)

Next, consider deleting the values currently stored in your TPM. 

WARNING WARNING WARNING: if you are using Bitlocker, make certain you will still be able to decrypt the drive after destroying the secrets in your TPM! At a minimum, this means making sure you’ve got scratch codes available. If you don’t have a full backup available that you are prepared and ready to use, strongly consider decrypting the drive before destroying the data in your TPM–if you turn out not to have the scratch codes, or have the wrong scratch codes, etc etc etc, there is no turning back.

If you have decided to go ahead and clear out your TPM now, click Start, type in tpm.msc, and hit Enter. The TPM settings dialog will pop up. Click “clear TPM.” 

Again, do not blindly clear your TPM if you are using BitLocker!

Once you have decided whether or not to pre-emptively clear your TPM, reboot the system, and check to see if your Microsoft 365 woes have been resolved. If they have not, and you haven’t cleared the TPM yet, you’ll need to make arrangements to ensure safety of your data, then clear the TPM, reboot once more, and try again.

If you still have no joy after completing both steps one and two and rebooting, it’s unfortunately time for the last and most obnoxious step.

Step three: create a new, clean Windows user profile

If you’ve added the registry keys and manually cleared the TPM, then rebooted, and your Microsoft 365 login and registration problems still aren’t fixed, the problem is very likely in an undiagnosed area of your user profile.

I only needed to perform this step on two of the ten or so machines I’ve resolved these TPM errors on in the last few weeks–but on those two machines, there was no getting around it; the whole user profile had to go.

The good news is, you can test whether this is necessary before actually destroying anything! Create a new local user on your system (or log in with a different domain user which has never logged into the local system, in an Active Directory environment), log out as the current user, and log in as the brand-new user profile.

Now, try to first activate Office365, then set up Outlook to access the affected user’s email. If you already completed steps one and two, this attempt should succeed with no issues. Once you’ve successfully both registered Office 365 to the affected user’s email account, and successfully logged into that user’s email account in desktop Outlook, you know your problem really was in the original Windows user profile.

At this point, you can do one of three things. You can:

  • Either continue setting up the new Windows profile for regular use, move the user’s data to the new profile, then destroy the old profile
  • Or you can back up the user’s data, destroy the user’s old profile, create a new profile with the same username / log into Active Directory with the same user credentials, then restore the user’s data
  • Or you can get out your Mad Scientist toolkit and start feverishly trying to analyze the broken profile and figure out why it’s broken (I have had no luck with this approach, myself).

Conclusion

I don’t know what’s going on at Microsoft right now, but these TPM errors have been a plague for quite a while, and Microsoft keeps failing to either fix the issue or even provide the sort of comprehensive workaround I’m documenting here.

The good news is, despite needing to fix ten or so machines and counting so far, the majority of the affected machines were fine after nothing but Step 1 (add registry keys) and a reboot, and most of the rest were okay with only adding Step 2 (clear TPM values) and a reboot.

Again, I beg, plead, warn, scream at you: do not blindly clear the TPM without considering the impact on associated services, especially BitLocker.

Finally, of the two machines that still refused to work properly after clearing the TPM, Step 3 (blowing away the user’s Windows profile, then either manually recreating it from scratch or logging in again into an AD environment to recreate it from scratch) worked a treat.

So far, I have not encountered any machine that wouldn’t resume O365 functionality after following this guide. (Knock on wood). Good luck, fellow sysadmin or helldesk veteran, and may the Force be with you…

And please, please, please do not blindly clear the TPM without considering the consequences to associated services such as but not limited to BitLocker!
Windows, KVM, and time zones

If you’re running Windows VMs beneath a Linux KVM host, you’ve very likely been plagued by an annoying issue: they start up with the wrong time by several hours, every time they’re rebooted, no matter what you do.

The issue is that Windows syncs its time with the local hardware clock, and in KVM’s case, it generally provides VMs with a “hardware” clock set to UTC regardless of what the real hardware clock’s time zone is set to.

Here’s the fix: on your Windows VM, create a new text file called UTCtime.reg, and populate it with the following:

Windows Registry Editor Version 5.00

[HKEY_LOCAL_MACHINE\SYSTEM\CurrentControlSet\Control\TimeZoneInformation]
"RealTimeIsUniversal"=dword:00000001

Now you can just double-click the patch file to import it into the VM’s registry, then reboot the VM. When it comes back up, it’ll come back up with the correct time (assuming your hardware clock is set to the correct time, of course).

IDK about y’all, but this one had been pissing me off for years; it’s nice to finally have a fix for it!

PSA: Cannot open Credentials Manager

I blew several INCREDIBLY frustrating hours trying to troubleshoot issues installing Google Workspace Sync and Microsoft Office 365 on multiple Windows 10 workstations today.

Searching for “failed to create profile” errors when setting up a Google Workspace Sync user for Outlook frequently nets you advice to fire up Windows’ Credential Manager and delete rogue credentials. The same advice often pops up for the dreaded “Trusted Platform Module Has Malfunctioned” error when attempting to register a freshly-downloaded Office 365 application to a user.

Unfortunately, trying to open Credential Manager also fails on affected PCs, with the error “An error occurred while performing this action: 0x80090345.” This was what finally led me to the workaround to the single issue affecting both Office365 setup and Google Workspace Sync setup.

First, open regedit on the affected PC. Then navigate to HKEY_LOCAL_MACHINE\Software\Microsoft\Cryptography\Protect\Providers\df9d8cd0-1501-11d1-8c7a-00c04fc297eb, and create a new registry DWORD value ProtectionPolicy, and set it to 1.

After creating the new DWORD and setting it to 1, restart your PC, and opening Credential Manager should then work fine. Once Credential Manager is open, delete anything you find in there, then register your Office365 apps and/or set up your Google Workspace Sync user.

That was four hours of my life I’m never getting back. Hope you found your answer sooner than I did!

WSL2, keychain, /etc/hosts and you

There unfortunately are still a few stumbling blocks toward getting a properly, fully-working virt-manager setup running under WSL2 on Windows 11.

apt install virt-manager just works, of course–but getting WSL2 to properly handle hostnames and SSH key passphrases takes a bit of tweaking.

First up, install a couple of additional packages:

apt install keychain ssh-askpass

The keychain package allows WSL2 to cache the passphrases for your SSH keys, and ssh-askpass allows virt-manager to bump requests up to you when necessary.

If you haven’t already done so, first generate yourself an SSH key and give it a passphrase:

me@my-win11:~# ssh-keygen
Generating public/private rsa key pair.
Enter file in which to save the key (~/.ssh/id_rsa):
Enter passphrase (empty for no passphrase):
Enter same passphrase again:
Your identification has been saved in ~/.ssh/id_rsa
Your public key has been saved in ~/.ssh/id_rsa.pub

You will also need to configure keychain itself, by adding the following to the end of your .bashrc:

# For Loading the SSH key
/usr/bin/keychain -q --nogui $HOME/.ssh/id_rsa
source $HOME/.keychain/$HOSTNAME-sh

Now, you’ll enter in your SSH key passphrase each time you open a WSL2 terminal, and it will remember it for SSH sessions opened via that terminal (or via apps opened from that terminal, eg if you type in virt-manager).

If you like to set hostnames in /etc/hosts to make your virt-manager connections look more reasonable, there’s one more step necessary. By default, for some reason WSL2 clobbers /etc/hosts each time it’s started.

You can defang this by creating /etc/wsl.conf and inserting this stanza:

[network]
generateHosts = false

Presto, you can now have a nice, secure, and well-working virt-manager under your Windows 11 WSL2 instance!

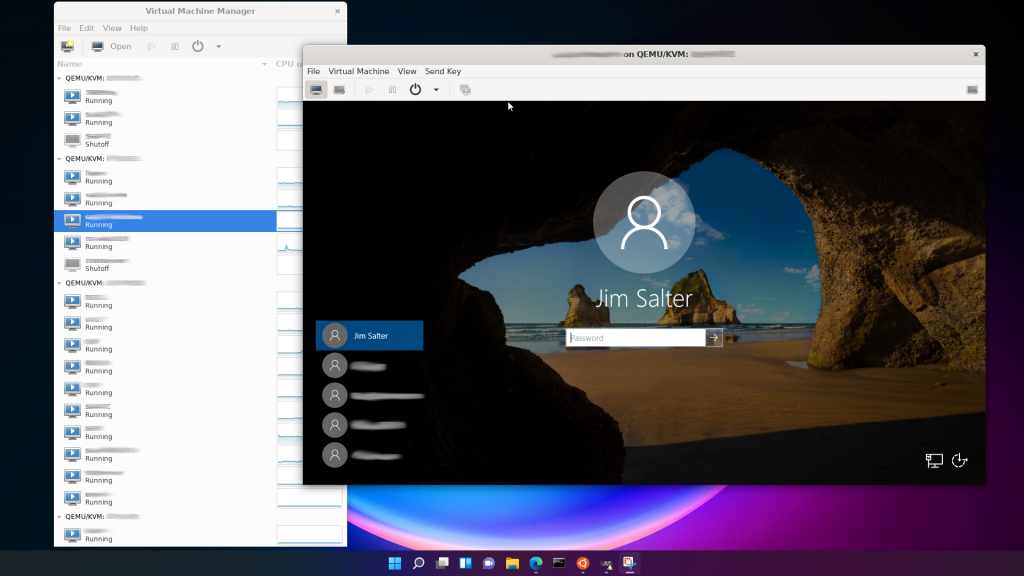
screenshot of virt-manager under WSLg
I also edited this screenshot with Ubuntu GiMP installed under WSL2 with apt install gimp. Because of course I did.

One final caveat: I do not recommend trying to create a shortcut in Windows to open virt-manager directly.

You can do that… but if you do, you’re liable to break things badly enough to require a Windows reboot. Windows 11 really doesn’t like launching WSL2 apps directly from a batch file, rather than from within a fully-launched WSL2 terminal!

Fixing Outlook 2016 “Either there is no default mail client…”

I have a client who can’t open .MSG files with a brand-new Office 10 Pro system, and gets the following error when he tries (using Outlook 2016, installed from Office 365):

Either there is no default mail client or the current mail client cannot fulfill the messaging request.

You might think “aha, I just need to go into the control panel and fix either file associations with .msg files, or perhaps MAPI settings.” You would be wrong. Nope, you’re gonna have to delete a registry key, because of course you are. You’re using Windows!

Open this registry address in regedit:

HKEY_LOCAL_MACHINE\SOFTWARE\Microsoft\Windows\CurrentVersion\PreviewHandlers 

And delete the key with Data value of “Microsoft Windows MAPI Preview Handler”.

Poof. That’s it. No more errors, stuff opens as it should. Yay.

PSA: don’t buy or trust Lenovo

There’s a big flurry in the IT world today about Lenovo shipping malware – oops, pardon me, a PUP or “Potentially Unwanted Program” – in some of its consumer laptops.

I’m going to try to keep my own technical coverage of this fairly brief; you can refer to ZDNet’s article for a somewhat glossier overview.

Superfish – the maladware in question – does the following:

  • installs a certificate in the Trusted CA store on the infected machine
  • installs an SSL-enabled proxy on the machine to intercept all HTTP and HTTPS traffic
  • automatically generates a new certificate from the Superfish CA onboard to match any SSL connection that’s being made

So Superfish is sniffing literally ALL of the traffic on your machine – everything from browsing Reddit to transferring funds online with your bank. But wait, it gets worse:

  • Superfish’s proxy does not pass on validation errors it encounters
  • uninstalling Superfish does not remove the bogus CA cert from your machine
  • all machines use the same private key for all Superfish-generated certs

This means that if you have Superfish, anyone can insert themselves in your traffic – go to a coffee shop, and anyone who wants to can intercept your wireless connection, use a completely bogus certificate to claim to be your bank, and Superfish will obligingly stamp its own bogus certificate on top of the connection – which your browser trusts, which means you get the green lock icon and no warning even though both Superfish and the other attacker are actively compromising your connection – they can steal credentials, change the content of the pages you see, perform actions as you while you’re logged in, sky’s the limit.

This also means that even after you remove Superfish, if you haven’t manually found and deleted the bogus CA certificate, anybody who is aware of Superfish can generate bogus certificates that pass the Superfish CA – so you’re still vulnerable to being MITM’ed by literally anybody anywhere, even though you’ve removed Superfish itself.

So, this is bad. Really bad. Far worse than the usual bloatware / shovelware crap found on consumer machines. In fact, this is unusually bad even by the already-terrible standards of “PUPs” which mangle and modify your web traffic. But that’s not the worst part. The worst part is Lenovo’s official statement (mirrored on the Wayback Machine in case they alter it):

We have thoroughly investigated this technology and do not find any evidence to substantiate security concerns. […] The relationship with Superfish is not financially significant; our goal was to enhance the experience for users.

this-is-fine

The company is looking you dead in the eye and telling you that they didn’t care about the money they got for installing software that injects ads into your web browsing experience, they did it because they thought it would be awesome for you.

You can take that one of two ways: either they’re far too malicious to trust with your IT purchases, or they’re far too ignorant to trust with your IT purchases. I cannot for the life of me think of a third option.

Three Step Guide to X11 Forwarding

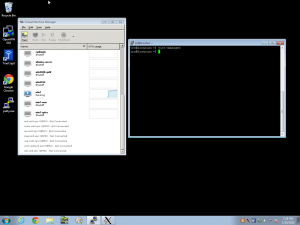
Got a graphical application you want to run on a Linux box, but display on a Windows box? It’s stupidly easy. I can’t believe how long it took me to learn how to do this, even though I knew it was possible to. Hopefully, this will save some other sysadmin from not having this trick in the toolbox. (It’s particularly useful for running virt-manager when you don’t have a Linux machine to sit in front of.)

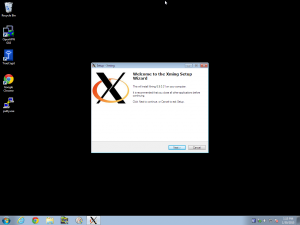
Install Xming
Install Xming
Step 1: download and install Xming (probably from Softpedia, since Sourceforge is full of malware and BS misleading downloads now)

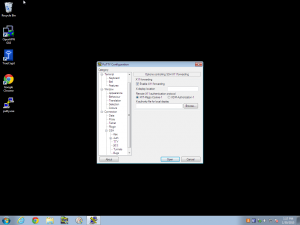
Enable X11 Forwarding
Step 2: in PuTTY’s configs on your Windows box, Connection –> SSH –> X11 –> check the “Enable X11 Forwarding” box.

Run from SSH
Run from SSH
Step 3: SSH into a Linux box, and run a GUI application from the command line. Poof, the app shows up on your Windows desktop!

MSE Install fails with 0x8004FF91

Well, this was an annoying one, and it’s hard to find the one thread that actually addresses it amongst the ones conflating it with an off-by-one error code (subtract one from 0x8004FF91. not going to actually say it here to avoid poisoning Google).

TL;DR if you can’t install Microsoft Security Essentials – even on a brand new install of Win7 64 bit – it’s probably due to Windows Update KB3004394. Uninstall that update, and MSE will install just fine.

UPDATE: KB3004394 has been acknowledged as bad by MS. And the problems are actually a lot more far-reaching than just MSE installs; the KB botched an implementation of root certificate checking that causes all code signing checks to fail. Affected systems (Win7 SP1 and Win2008 R2 SP1 at least) will not be able to install signed device drivers, will not be able to install MSE, will get unexpected UAC prompts in weird places (due to signed code suddenly appearing unsigned and therefore untrusted)… oh, yeah, and Windows Update will fail, meaning that they’ll have to be manually fixed by either uninstalling the bad KB (at which point Windows Update will work again) or by manually downloading and installing KB3024777. Repeat manually – you can’t get it from Windows Update until Windows Update actually works, so…

Get it all in one sock, Microsoft.

Selectively disabling Windows UAC for individual applications

Today a client emailed me to report that since installing Quickbooks “Enterprise” (note the scare quotes there. they are used with malice), her users (who are, sensibly, not Administrators) were faced with a User Account Control prompt (“Do you want to allow the following program to make changes to your computer?”) every time they opened the new version of Quickbooks.  A little further investigation showed that “DBManagerExe.exe” was the actual file throwing the UAC dialog.  Absolutely no information from Intuit is available whatsoever about how or why this program wants Administrator privileges, ways to nerf it, etc – apparently this “Enterprise” product is just supposed to be run in “Enterprises” by users who are allowed full Administrator privileges.  Because, you know, that’s what “Enterprises” do.  Delightful.

I chased the issue around and around trying to figure out what DBManagerExe.exe actually wanted access to, so I could just grant that to the users… but eventually I was forced to give up and just disable UAC selectively for that one program.  Luckily, while the process is rather arcane, it’s not actually HARD.  So let’s document it here.

1. Download the Microsoft Application Compatibility Toolkit.  I won’t link it here, to avoid creating stale links – just Google it, it should come right up.  Pick the latest version available (currently, 5.6).  Run the installer.

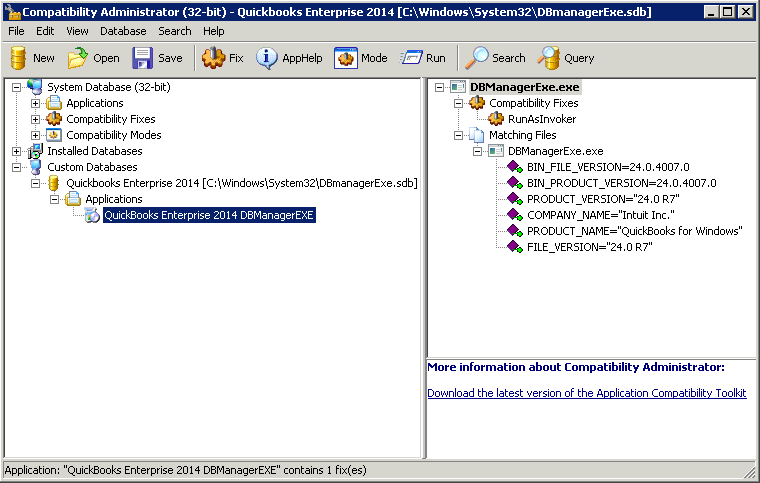
2. start –> all programs –> Microsoft Application Compatibility Toolkit –> Compatibility Administrator (32-bit) or Compatibility Administrator (64-bit), as appropriate. Note: just because your system is 64-bit does not necessarily mean that’s the Compatibility Administrator you want here – this needs to match the application you want to selectively allow UAC-less admin privileges for, not the system as a whole!  For DBManagerEXE.exe, I needed to select 32-bit.  Further note: if you are not logged in as the actual Administrator account, you should right-click and “Run As Administrator” to open the Compatibility Manager.  Otherwise, your “fix” won’t fix anything.

3. Click the “Fix” icon on the top toolbar.  Click “Browse” to find the executable you want to enable – for me, it was C:\Program Files (x86)\Intuit\QuickBooks Enterprise Solutions 14.0\DBManagerExe.exe.  Now, enter the name of the program and vendor in the two text boxes above the location in the dialog – this will make it easier to manage later, if you ever need to figure out what you’ve done and to whom.  Click Next.

4. Under Compatibility Modes, click none.  You don’t want this.  (Unless you do, of course, but Compatibility Modes aren’t needed for nerfing UAC dialogs, they’re for something COMPLETELY different and certainly aren’t applicable to running Quickbooks Enterprise 2014, in this case.)  Click Next.

5. Find RunAs Invoker on the list of Compatibility Fixes.  Check it.  Don’t mess with anything else.  Click Next, then click Finish.

6. Save your database (from the button on the toolbar).  Give it a name that makes sense, and save it in C:\Windows\System32. 8. File –> Install from the top menu.  You’ll get a dialog box confirming that you’ve installed your fix.  You should be done now.

Log in as an unprivileged user and test – in my case, for enabling non-Administrators to open Quickbooks “Enterprise” 2014, it worked flawlessly – no more UAC prompt, now the user went straight to the new setup wizard as they should.

Disable_UAC_selectively

Note: for this particular diabolically badly written application, just disabling UAC probably won’t be enough: QuickBooks also tends to fail miserably at starting its database manager service due to not placing its service user group into the local Administrators group. Each year of QB will create its own service user, in the form QBDataServiceUser24 or similar. If you’re here specifically for Quickbooks and you still get a nasty, this time NON Windows “you need to be administrator” prompt when you launch QB, you’ll need to find your local service user for the year of Quickbooks in question and add it to the local Administrators group on your machine. Yay, Intuit.

Using LogMeIn remote control with Linux

In 2013, LogMeIn decided to start forcing the download of a Windows-only executable file for remote control of computers. This, of course, leaves Linux users in the lurch.

The previous Flash interface is still THERE, and in fact it’s SUPPOSED to be available with a click – if you don’t have the plugin, you’re supposed to be presented with a page offering to let you download the plugin OR click another link to go to the Flash interface. Unfortunately, on Linux (Ubuntu at least), said page just instantly flashes away and takes you back to the splash page for the computer you’re connected to.

The workaround here is to log into your LogMeIn account, click the computer you want to control and connect to it (using your login credentials), and then INSTEAD OF CLICKING REMOTE CONTROL go to your address bar and replace “/main.html” at the end of the current URL with “/remctrl.html?type=flash” instead. Hit enter, and your remote control session will start as normal.

BOO to LogMeIn for making this so freaking difficult. >=[